

if you’re anything like me, you get bored with your decor. if you only knew how many times i redecorated my small apartment, sometimes even before i finish the first idea! i had these black and white patterned curtains up since i moved in four years ago, and i didn’t really want to spend $30 a panel buying new ones, especially since i would need four panels. i decided to make my own and i wanted it to be cheap! each panel ended up costing me about $8-10 and are 100% customized. the process was really simple, but took me most of the day.
materials (for four panels):
+ two 6′ x 9′ canvas drop cloths
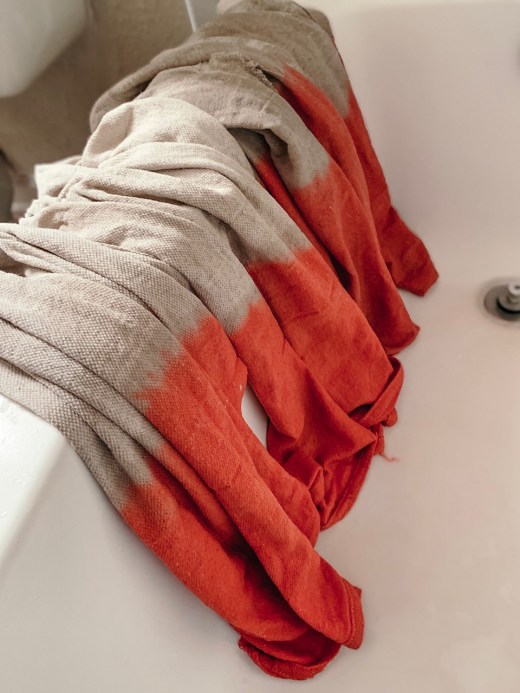
+ one bottle of rit dye, i used the color coral
+ three packages of curtain rod clips
+ yarn, string, & beads of your choice for tassels
+ fabric sticking tape
first, open your packages of drop cloths and cut them in half, making two 3′ x 9′ panels. you may notice that your drop cloths are different, have different hems, etc.. and that’s okay! i kind of prefer the imperfection in things. it makes each one unique!


next, you dye the fabric according to dye instructions. (side note – if you don’t want to smell the canvas/burlap smell for days, i would suggest washing them first, haha. just an after thought!) i only wanted to dye the bottoms, so i mixed the dye into a plastic bucket. i left them in there for about 35 minutes, lifting and dipping back in occasionally to ensure all of the pieces were being soaked!


once the dyeing process is complete, you will have to let them dry. they will look a little darker when wet, but you’ll have a general idea of color!
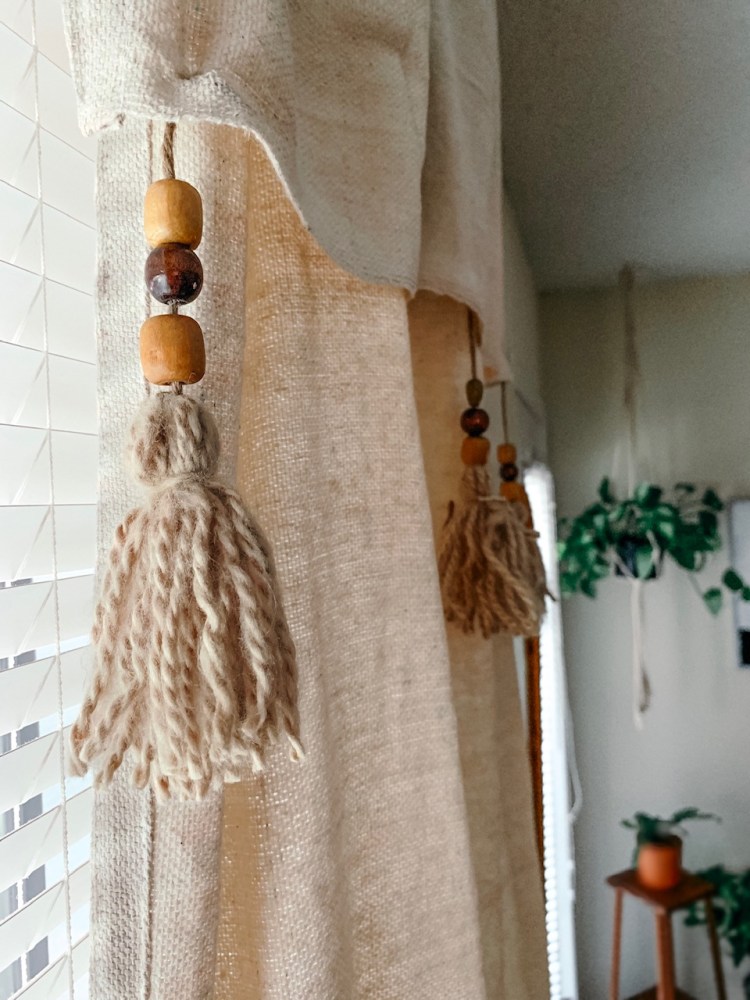
while my fabric was soaking in the bucket, i started on my tassels. you could cut a piece of cardboard for this step, but i find it is MUCH easier using this wooden bucilla tool made by plaid! (i will link at the end.)
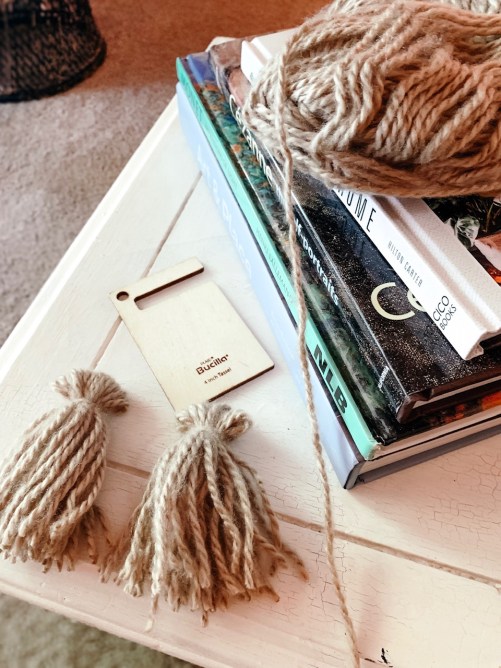
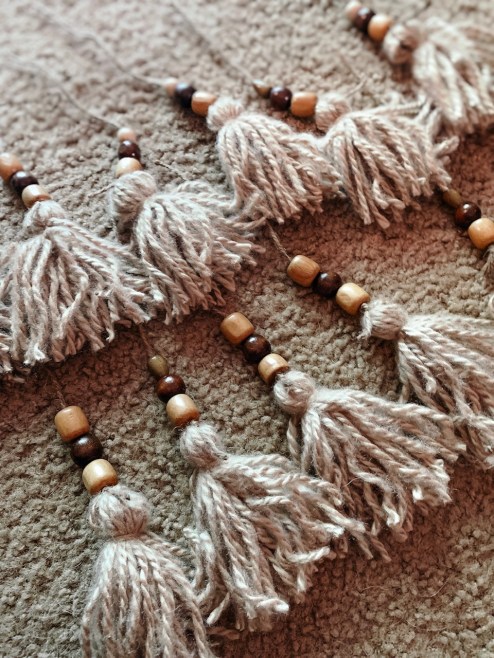
you will see, i also attached beads to give them a little extra something. you could of course do whatever you like with these, or even leave them out! because of how much yarn i had (i used a skein i already had at home), i was only able to make three tassels per panel, but since they’re only 3′ wide, it actually was perfect! too many more may have been too much.
once your panels have completely dried, you can use a hemming tape to fold over the rough edge where you cut the fabric. i used one that you didn’t have to iron. it required a lot more than i had anticipated, so i only ended up doing two panels with this. but again, because i’m okay with rough edges and imperfections, the two that i didn’t hem/fold over actually turned out just fine!
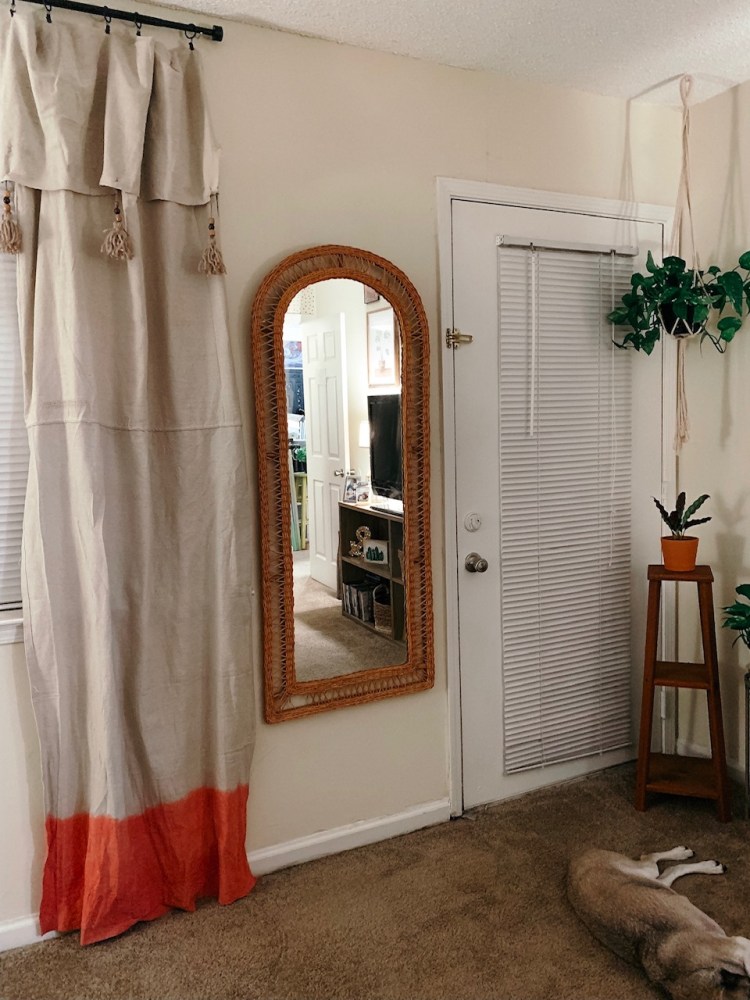
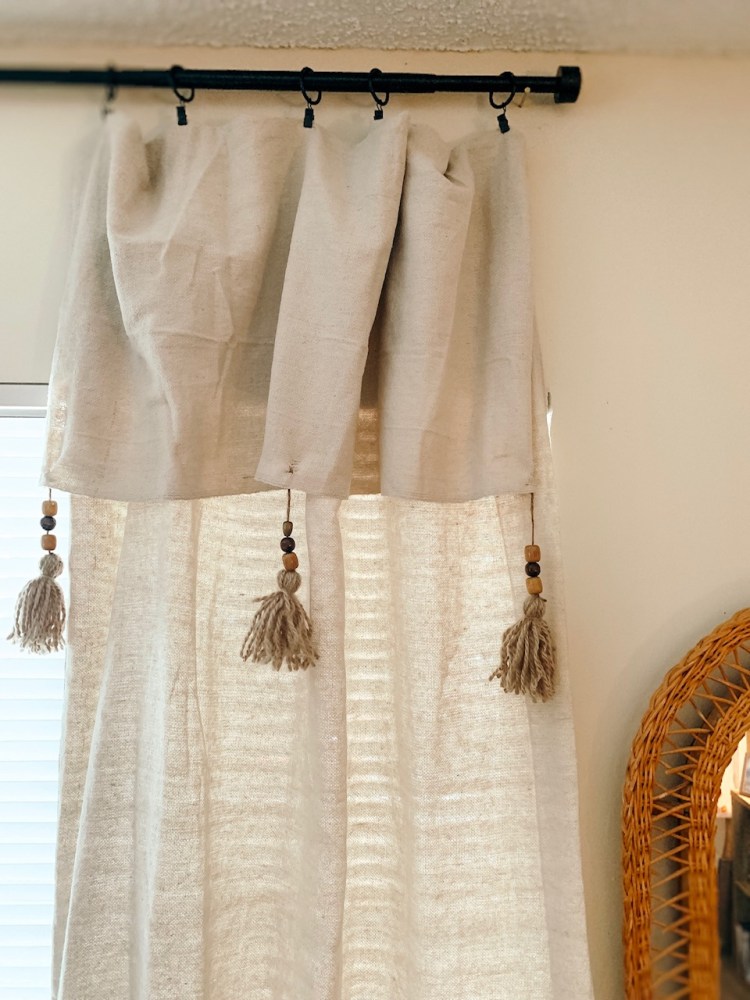
next, depending on how tall your ceilings are/where you’re hanging the rod, you will most likely need to fold over a flap at the top before clipping the rings to hang. i had to fold mine about 16 inches or so and i hung mine all the way to the ceiling to give the “taller ceiling” effect, haha. (ya gotta do what ya gotta do when you live in a small apartment!)
once you’ve folded this flap, you will then attach your tassels. i cut two small holes at the edge of the flap to weave in the string to tie them on. i just used your basic hemp string to hang them! (keeping with the natural look.)


now, clip on your rings! i used five per panel because again, they’re not very wide! but that’s all preference. (it also saved me not having to buy four packs of rings!)
now HANG! i am OBSESSED with how these turned out. the coral lightened up to a faded dark pink and it’s perfect. just the right amount of drama! i probably could have even dipped them more and it would have been great too!

happy curtain making!!
cheers!
link to tassel maker: https://plaidonline.com/products/bucilla-tassel-maker-3-pc link to ring clips: https://www.walmart.com/ip/Mainstays-Oil-Rubbed-Bronze-Curtain-Clip-Rings-Set-of-Seven/21081337
link to peel & stick fabric tape: https://www.walmart.com/ip/Peel-n-Stick-5-8-Fabric-Fuse-Adhesive-Roll-20-Ft/17422553

So creative. I love the tassels and the splash of color on the bottom. Smart idea.
LikeLiked by 1 person
thank you! i almost wish i had dyed them
higher, the color turned out great!
LikeLike